

The harmonic balancer on the Mercedes 113k has a narrow key that often shears under the added stress of a larger crank pulley that produces more boost. Once that happens, repairing the crank snout can be very costly, so it’s better to keep it from happening in the first place. You do this by “pinning” the balancer to the crankshaft.
The idea is to drill a hole that is centered at the interface between the crank snout and the damper, leaving a half-moon shaped groove on each, that will accept a hardened dowel pin. The pin will act as a second key and should keep the pulley from spinning on the crank. There are a couple places that make crank pinning kits, but since I have an aftermarket damper, I decided to make my own with a little help from a friend with a lathe.

To make the pinning kit, take an old crankshaft bolt and drill two 1/4″ diameter holes whose centers are exactly at the interface between the crank snout and the damper. Make the holes 180° from each other so you can see the keyway through one hole. Then use the other one as your drill guide. This will ensure your pin ends up exactly 180° from your key.

Then make a sacrificial spacer that can be temporarily installed in the space between the end of the crankshaft and the back side of the bolt head. This will fill the void and give your drill bit something to bite into as it makes its way through the damper, before it hits the crank.

Here’s the spacer installed before the bolt goes in. The whole point of the spacer is to give the drill bit solid metal to bite into as it navigates the void behind the bolt head, before the end of the crank.

Take careful measurements and determine how deep you need to drill. Mark a 1/4″ drill bit with some tape so you go to the exact right depth.

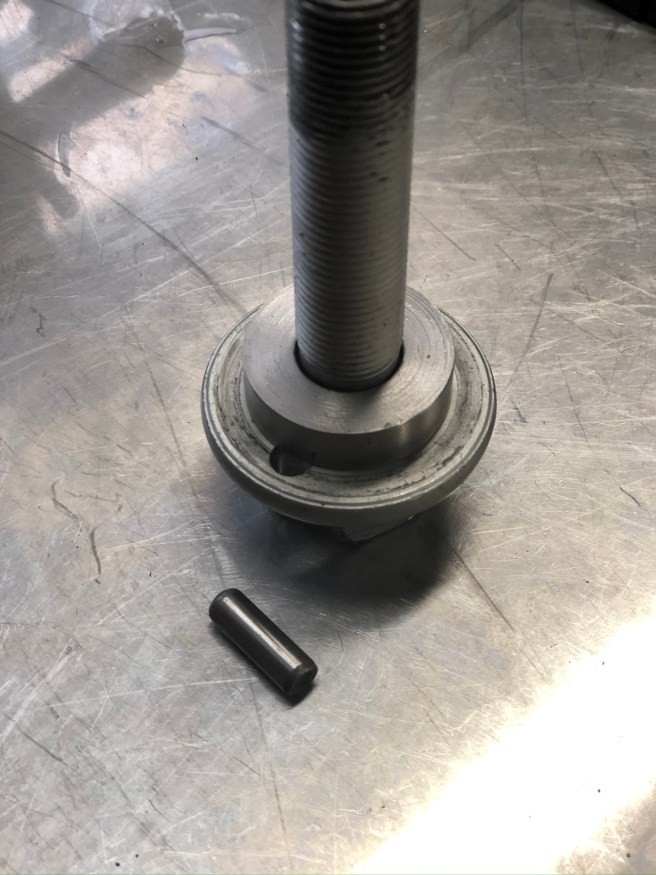
This is what the spacer looks like after you’ve used it. Remove it before installing your new crank bolt and save it in case you need to use it again. It can be used several times, until the entire perimeter is full of scallops.

Here’s the finished product. I put a dab of blue locktite on the dowel for good measure, but it’s not going anywhere with the crank bolt in place.
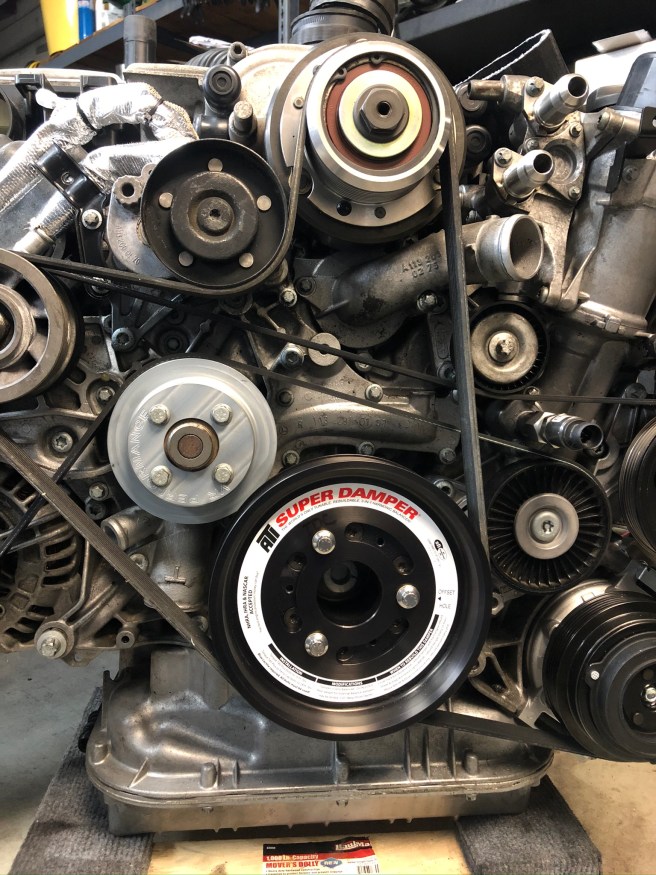
Here’s a shot of the final installation, with the 188mm pulley ring bolted to the ATI SuperDamper that I had made last year. Notice the need for a stepped water pump pulley.
Joe, I got myself in pinch this week when I found that my pulley had the infamous wobble to it. I purchased a 180mm pulley and proceeded to change it, only to find the bolt from the old pulley came out with my fingers! Obviously someone had changed the pulley before, and did not tighten it properly. It took several hours to get the pulley off the now galled crankshaft snout. Once off I found that the pulley took the brunt of the damage, and I cleaned up the snout as well as I could. The key was destroyed. Not wanting to disassemble the entire engine at this time, I put a small bead if weld on top of the old key, and then fabricated the guide bolt and sacrificial spacer. I had some hardened .247″ clutch pressure plate/flywheel pins, and I shortened them to about .900″. Drilling required a 1/4″ drill bit made for hard metals, and patience. After drilling and cleaning up, everything went together smoothly. Thank you for this really helpful article!